


Our Materials Arrived!

Most Important and laborious job: Mixing cement.

Our mason reinforcing the hole with cement and rocks.

First side done!

Time to put in the floor (the next day).

We used whatever we could find to make the floor, including raw wood (branches) and this old zinc.

Hammering it all together.

Next step, put the varilla in to reinforce the cement for the floor.

Make sure to make molds for the hole and air vent tube!

We used an old baby formula can.
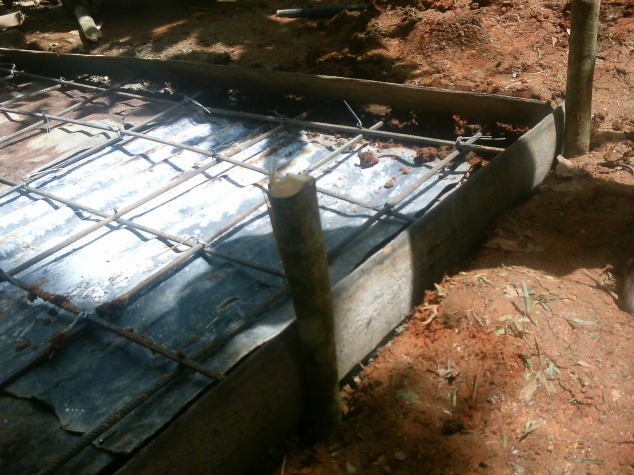
Prepping for the cement. We used old palm tree wood that was laying around the make the floor mold, and some branches to hold it up. It’s all about being resourceful.

These varilla were vertical in order to reinforce the casita when we mounted the wood house.

Ready for cement!

Make sure to cement the tubes in places first, or they will just get knocked down and moved when you dump your cement in the mold.

Time to smooth it all out.

Doesn’t that just look so pretty?

After it dries for about an hour (yes, just an hour, the sol is pretty strong here), you can smooth it out.

Then, as I just learned, you sprinkle some dry cement and re-smooth, twice. It gives it a nice matte finish.

So satisfying to see it smooth…

Day 3: Time to put up the house!

Just for this latrine, we mounted the house on some cement blocks they had left over to avoid water damage and preserve the wood for longer.

These guys did both the latrine houses in about three hours.

The ultimate trust test. After all, what are friends for?

TA-DAH! All shiny new zinc and nice ventilation tube, and BAM we have a latrine!
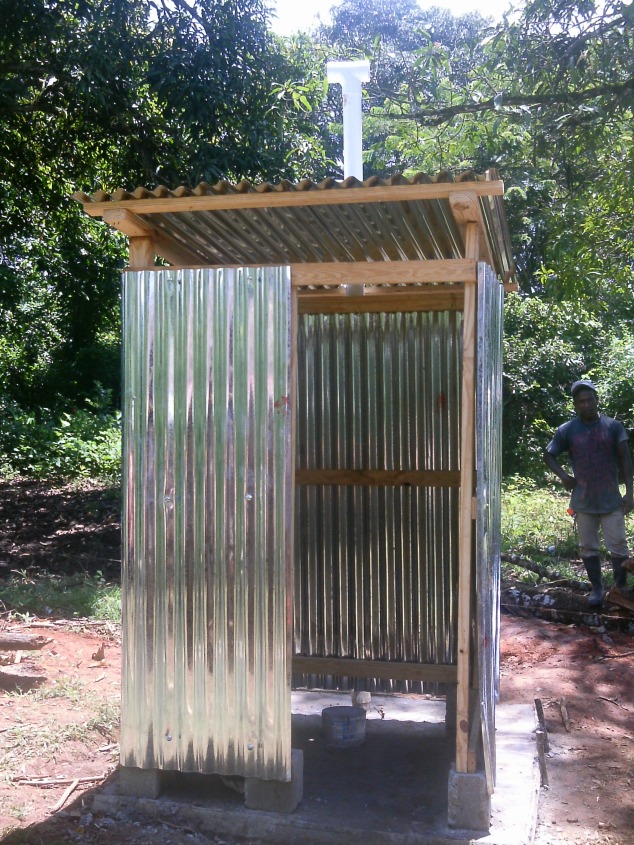
The only thing missing is a door and the toilet seat mold (we ran out of wood).
